11.5 RAID
Introduction
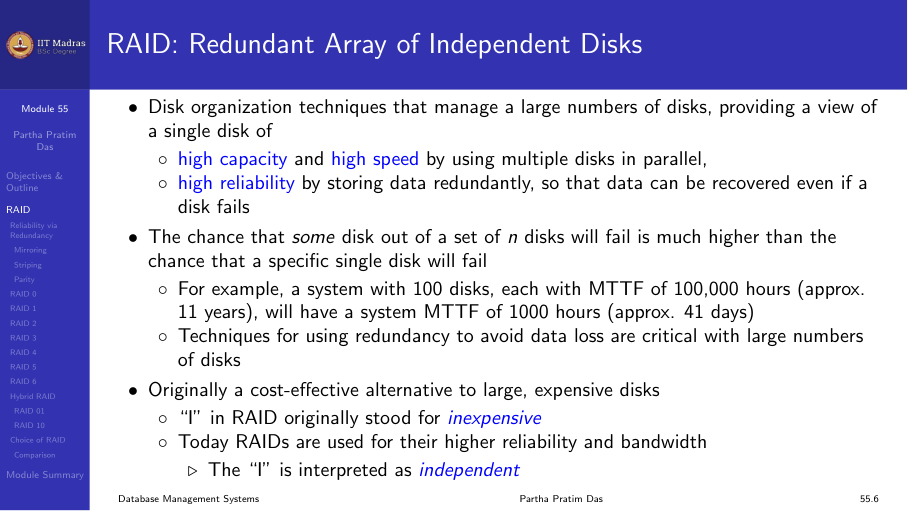
RAID (Redundant Array of Independent Disks) is a disk organization technique that manages a large number of disks, providing a view of a single disk of:
- High capacity and high speed by using multiple disks in parallel.
- High reliability by storing data redundantly, so that data can be recovered even if a disk fails.
Reliability via redundancy
Mirroring
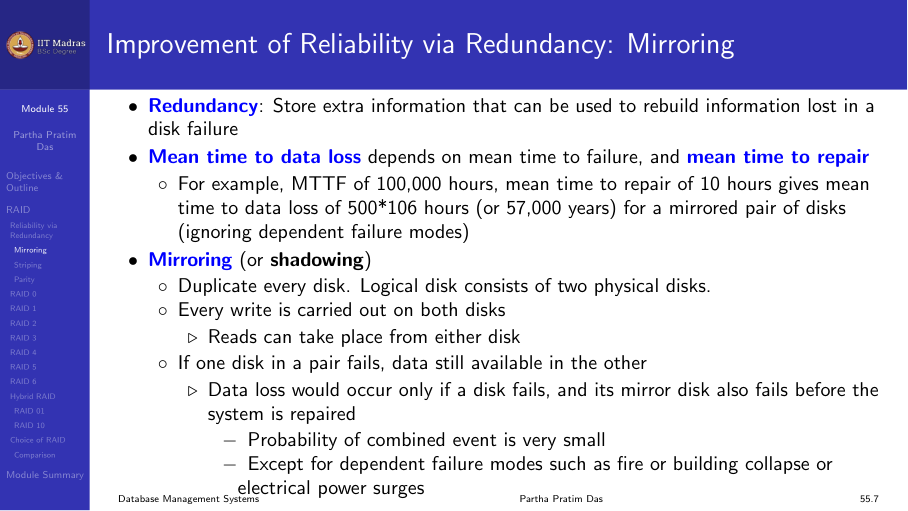
Store extra information (redundancy) that can be used to rebuild information lost in a disk failure. In mirroring, each disk has an identical copy.
Mean time to data loss depends on mean time to failure (MTTF) and mean time to repair (MTTR). For example, MTTF of 100,000 hours and MTTR of 10 hours gives a combined MTTF much higher than a single disk.
Striping
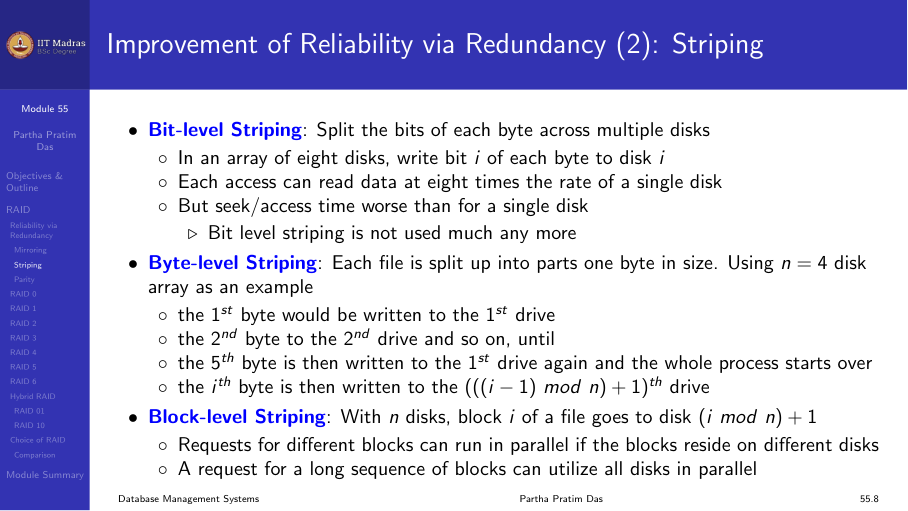
Bit-level striping. Split the bits of each byte across multiple disks. In an array of eight disks, write bit i of each byte to disk i. Each access can read data at eight times the rate of a single disk. However, seek/access time is worse. Bit-level striping is not used much anymore.
Parity
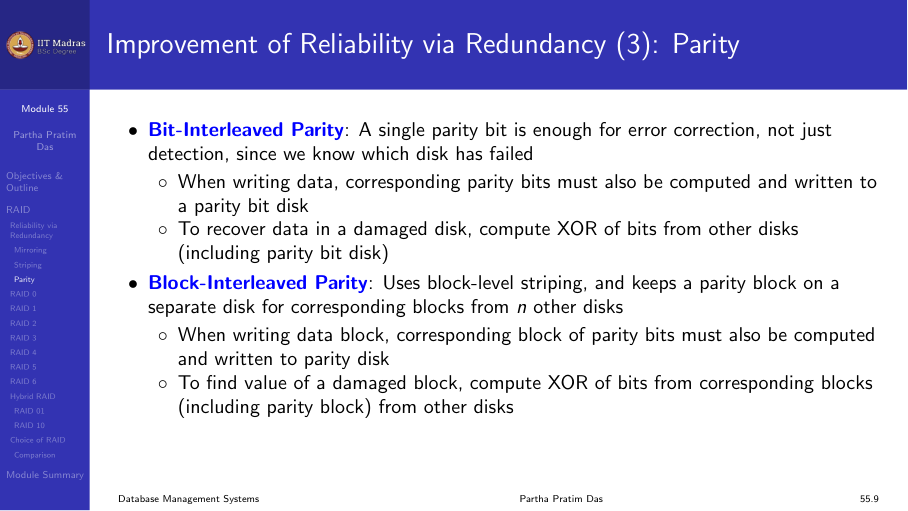
Bit-interleaved parity. A single parity bit is enough for error correction (not just detection) because we know which disk has failed.
When writing data, corresponding parity bits must also be computed and written to a parity disk. To recover data in a damaged disk, compute XOR of bits from other disks.
Standard RAID levels
The most common RAID levels employ striping, mirroring, or parity:
RAID 0: Striping
RAID 0 uses data striping only — no redundant information is maintained. If one disk fails, all data in the array is lost. Space utilization is 100%.
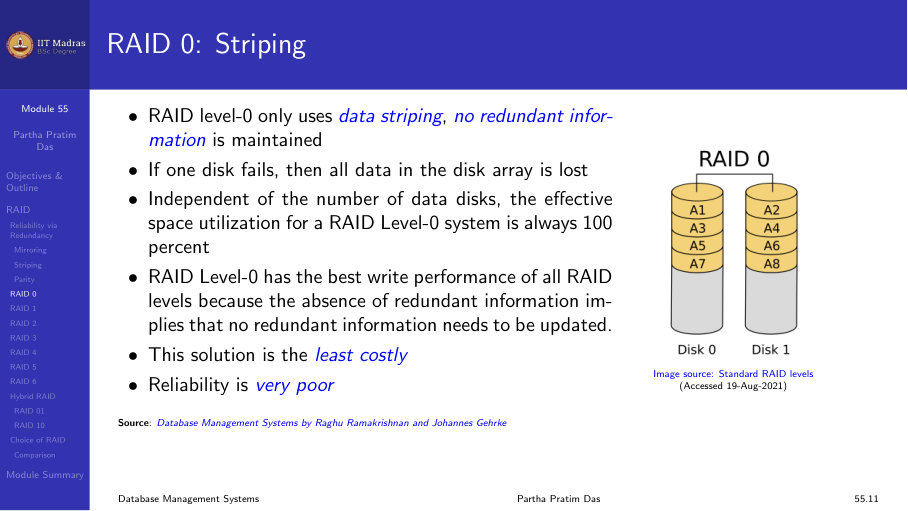
| Pros | Cons |
|---|---|
| Maximum storage capacity | No fault tolerance |
| Best write performance | Any disk failure destroys all data |
RAID 1: Mirroring
RAID 1 employs mirroring, maintaining two identical copies of data on two different disks. It provides excellent fault tolerance but is the most expensive solution (50% capacity utilization).
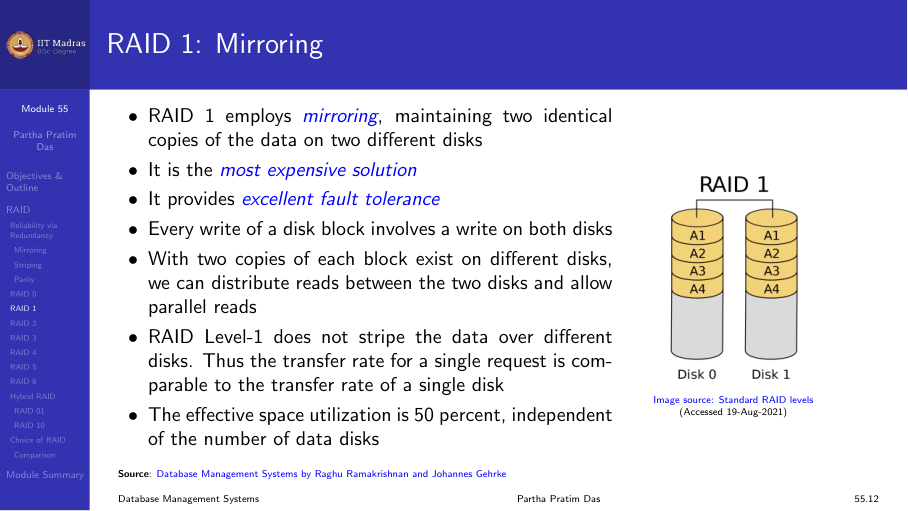
| Pros | Cons |
|---|---|
| Excellent fault tolerance | High cost (2x storage) |
| Fast reads (both copies can serve) | Write performance may be slower |
RAID 2: Parity with Hamming code
RAID 2 uses a designated drive for parity with bit-level striping. Hamming code is used for parity, which can detect up to two-bit errors or correct one-bit errors.
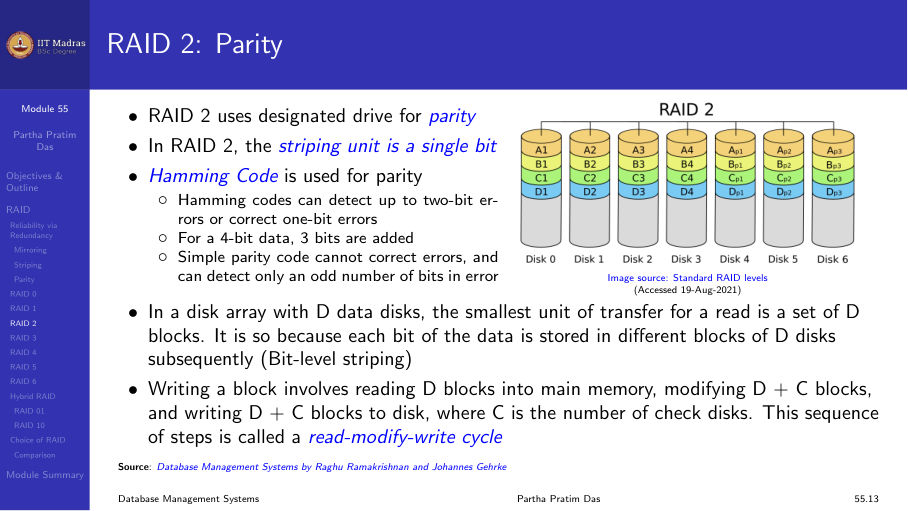
RAID 3: Byte striping + parity
RAID 3 has a single check disk with parity information. It uses byte-level striping. The reliability overhead is a single disk — the lowest possible.
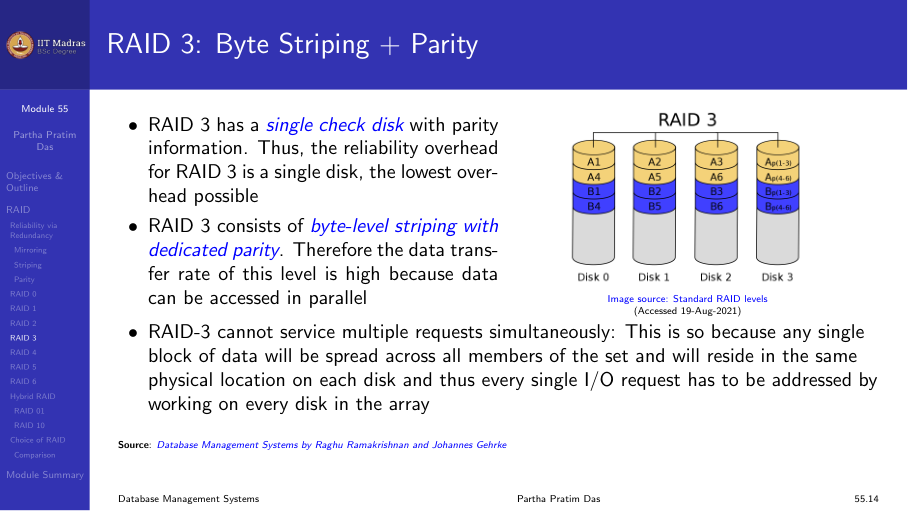
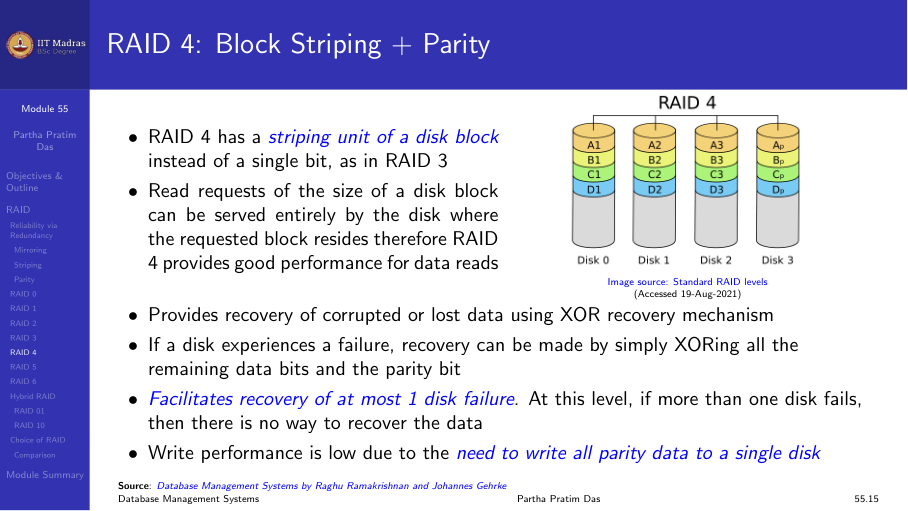
RAID 4: Block striping + parity
RAID 4 has a striping unit of a disk block (not a single bit). Read requests of block size can be served entirely by the disk where the requested block resides.
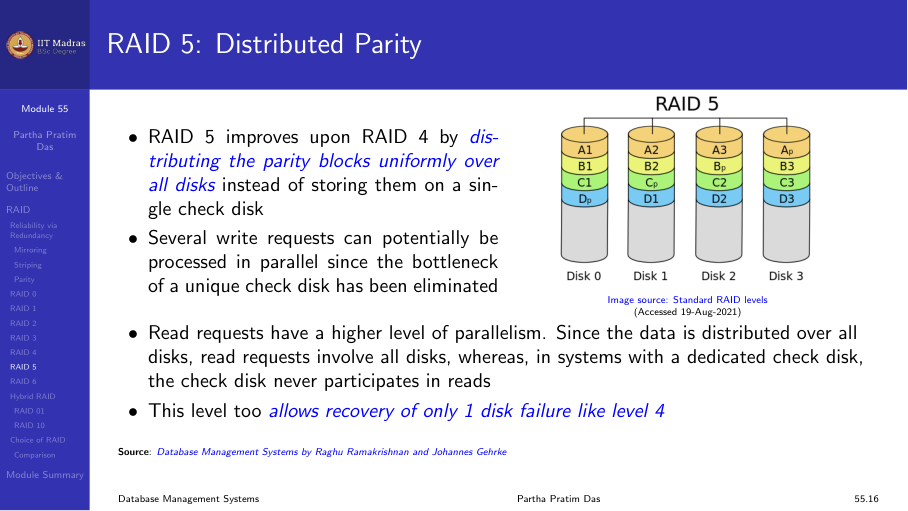
RAID 5: Distributed parity
RAID 5 improves upon RAID 4 by distributing parity blocks uniformly over all disks instead of storing them on a single check disk. Several write requests can be processed in parallel.
Requires at least 3 disks. Can tolerate one disk failure.
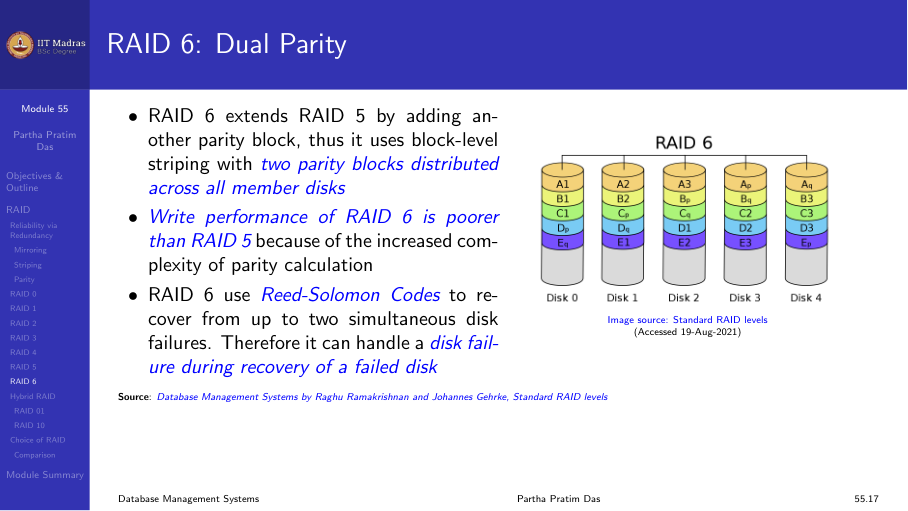
RAID 6: Dual parity
RAID 6 extends RAID 5 by adding another parity block. It uses block-level striping with two parity blocks distributed across all member disks. Can tolerate two simultaneous disk failures.
Requires at least 4 disks.
Nested RAID levels
Nested RAID levels combine two or more standard levels to gain performance and additional redundancy.
RAID 01 (RAID 0+1): Mirror of stripes
A mirror of stripes. It achieves both replication and sharing of data. The usable capacity is the same as RAID 1 (50%).
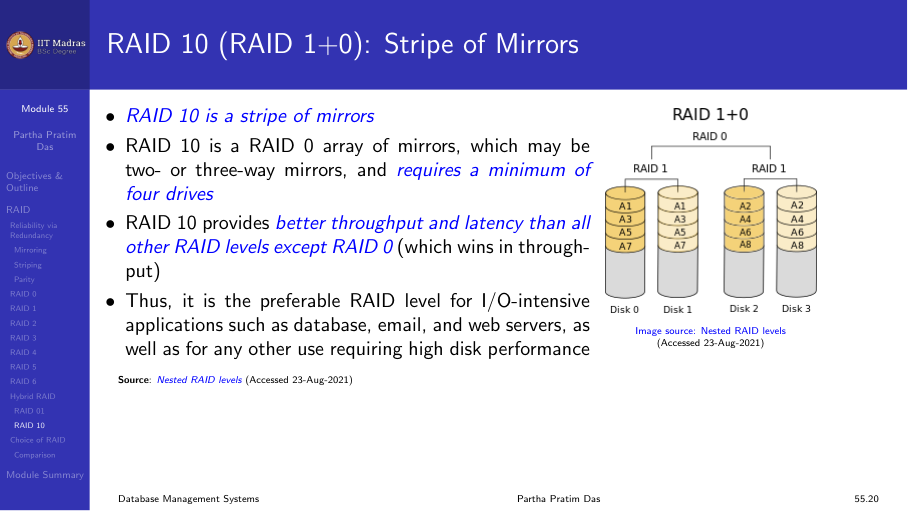
RAID 10 (RAID 1+0): Stripe of mirrors
A stripe of mirrors. RAID 10 provides better throughput and latency than all other levels. Requires a minimum of four drives. Can tolerate up to one failure per mirrored pair.
Choice of RAID levels
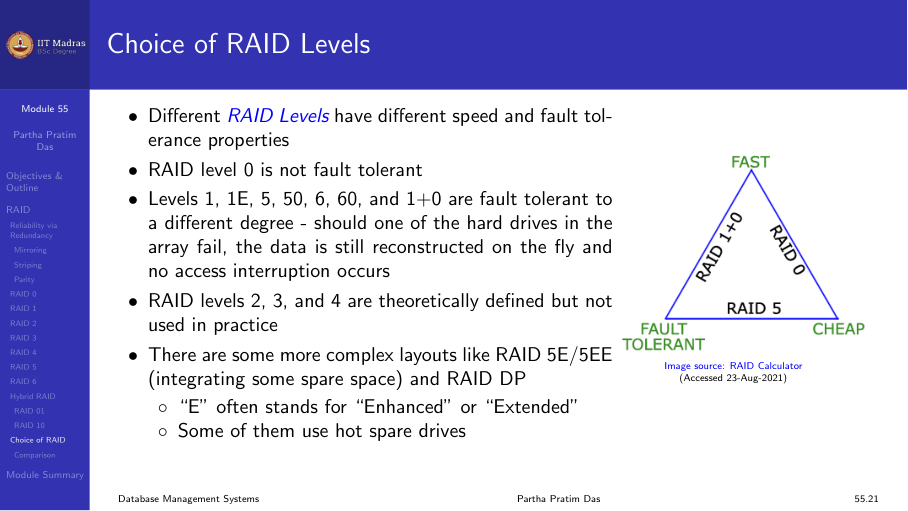
Different RAID levels have different speed and fault tolerance properties:
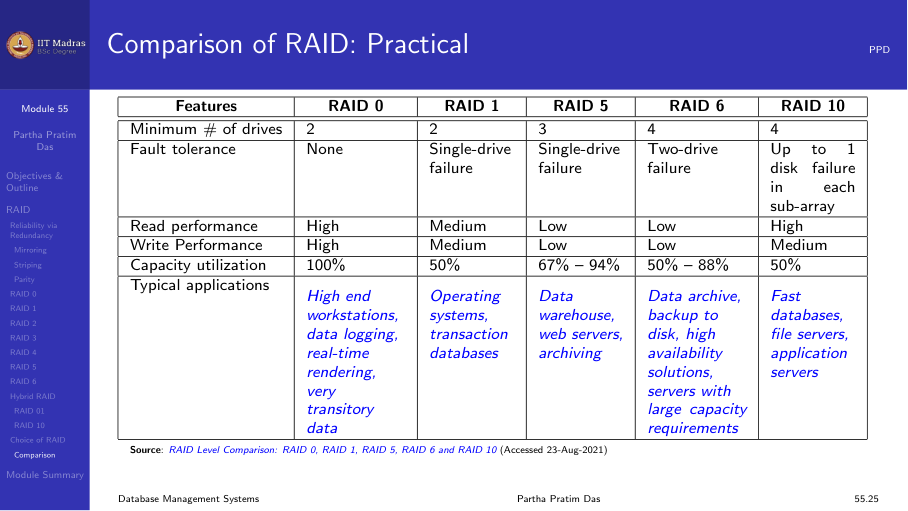
| Level | Min drives | Fault tolerance | Read perf | Write perf | Capacity |
|---|---|---|---|---|---|
| RAID 0 | 2 | None | Excellent | Excellent | 100% |
| RAID 1 | 2 | 1 drive | Good | Good | 50% |
| RAID 5 | 3 | 1 drive | Good | Moderate | (n-1)/n |
| RAID 6 | 4 | 2 drives | Good | Moderate | (n-2)/n |
| RAID 10 | 4 | Up to 1/pair | Excellent | Good | 50% |
Factors in choosing RAID level
- Monetary cost. RAID 1 is most expensive; RAID 0 cheapest but no redundancy.
- Performance. Number of I/O operations per second and bandwidth during normal operation.
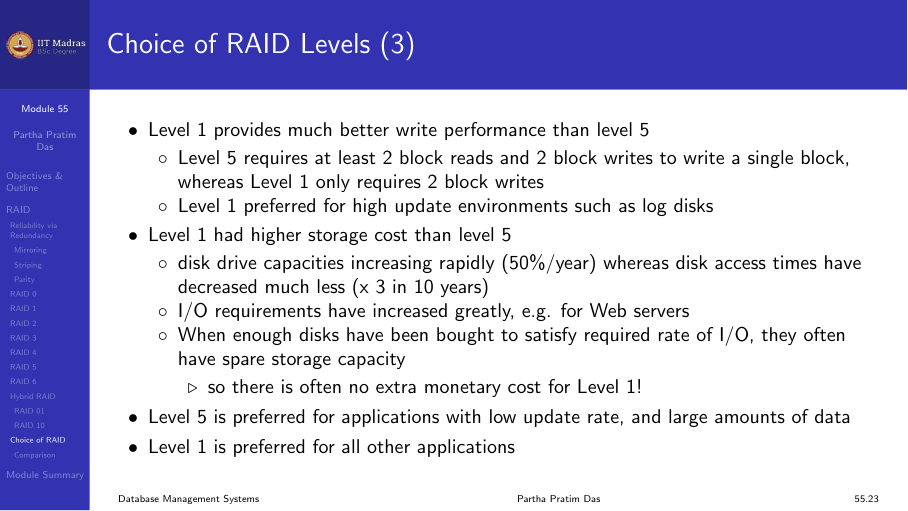
- Write performance. RAID 1 provides much better write performance than RAID 5. RAID 5 requires at least 2 block reads and 2 block writes to write a single block, whereas RAID 1 requires only 2 block writes.
- Use case. RAID 1 is preferred for high-update environments such as log disks. RAID 5/6 is preferred for large read-heavy data stores.
Comparison
| Level | Description | Space efficiency | Fault tolerance | Read | Write |
|---|---|---|---|---|---|
| 0 | Block striping | 100% | None | Fast | Fast |
| 1 | Mirroring | 50% | Single drive | Fast | Moderate |
| 5 | Distributed parity | (n-1)/n | Single drive | Fast | Slow |
| 6 | Dual parity | (n-2)/n | Two drives | Fast | Slow |
| 10 | Mirror + stripe | 50% | Up to 1/pair | Fast | Fast |
Summary
- RAID uses multiple disks for improved performance and reliability.
- RAID 0 (striping): maximum capacity, no fault tolerance.
- RAID 1 (mirroring): excellent fault tolerance, 50% capacity.
- RAID 5 (distributed parity): good balance of capacity and fault tolerance.
- RAID 6 (dual parity): tolerates two disk failures.
- RAID 10: combines mirroring and striping for best performance.
- Choice depends on cost, performance, and reliability requirements.